Update your community, engage members, and send communications to your audience
Update your community page
Click Leadership Dashboard in the top right corner (or Settings if you are an Organization Admin)
Select the community
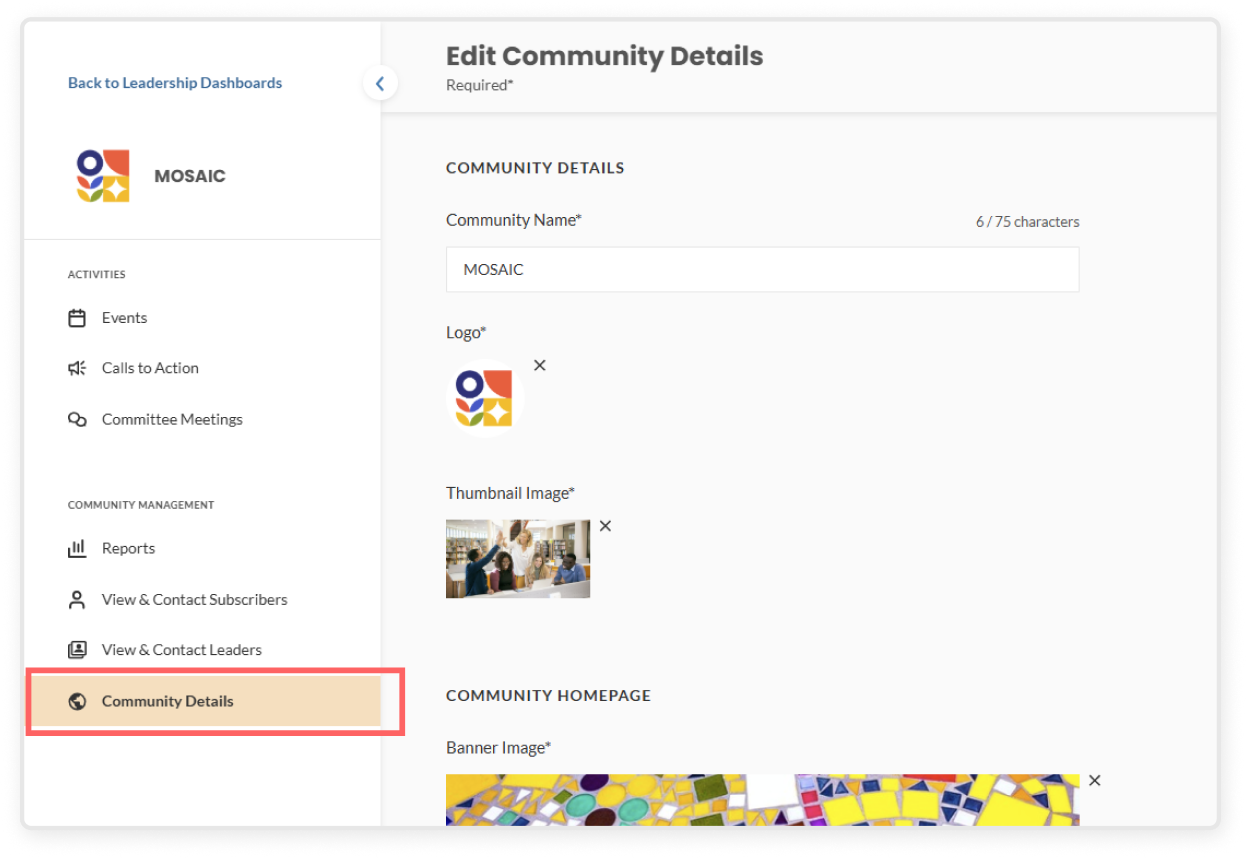
On the left sidebar, under Community Management, click Community Details
Here you can edit all of the details on the community homepage, including:
Community Name
Logo
Thumbnail image
Banner image
Subtitle
Mission statement
Communication channel
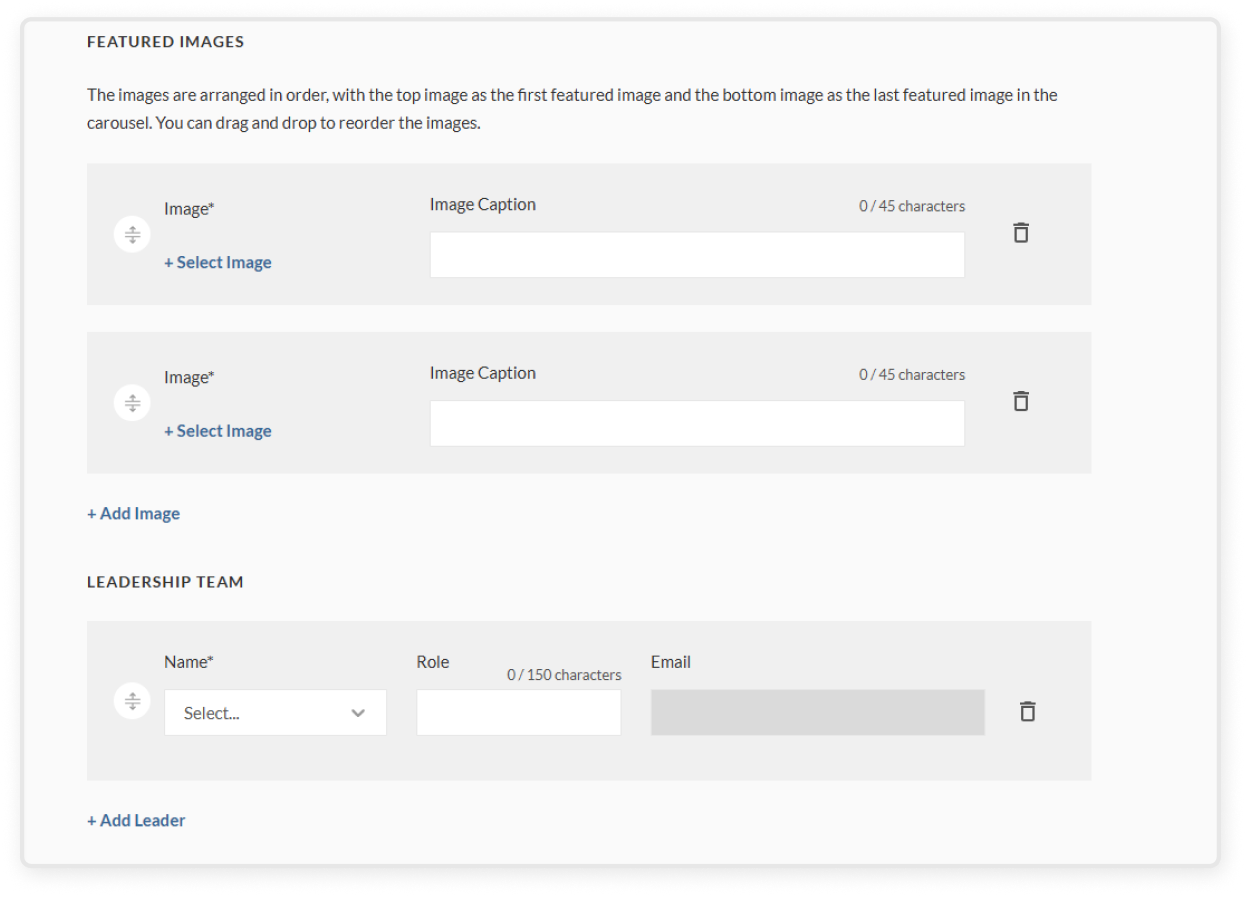
Featured images
You must upload at least two photos in order to save without errors
Once you add the image and caption, you may drag and drop to reorder the images
Leadership team
Please get confirmation from all current leaders and org admins before adding new leaders or removing leaders, as this will affect their admin permission levels
You may also choose to add roles/titles associated with each leader (e.g. Chair, Secretary, Treasurer, etc.) for more specificity
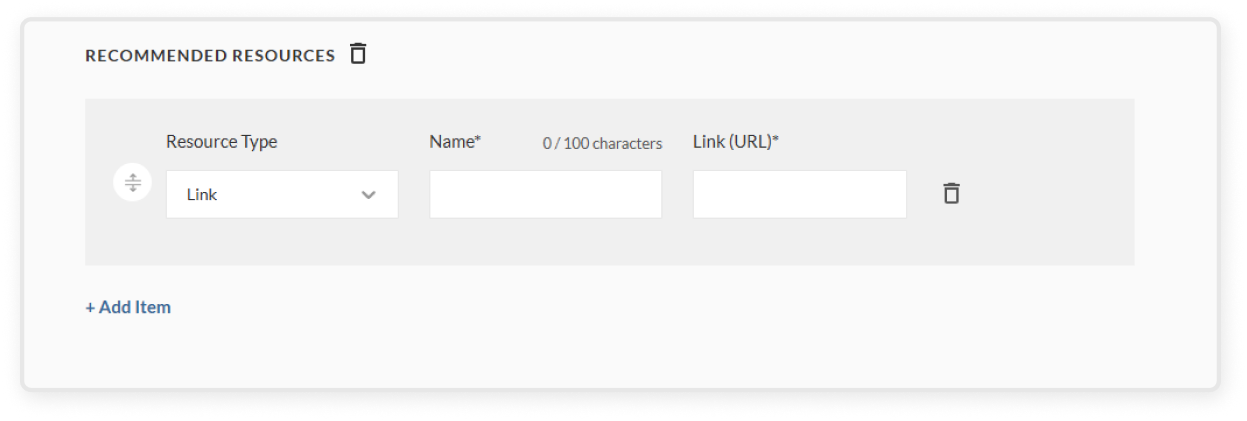
Recommended resources
Click Add recommended resources to expand
Select a resource type (link or document)
Enter a name for the resource
Depending on the resource type, either paste a link or upload a document
You can drag and drop to reorder how the resources appear in the list
Edit community leadership team
Please get confirmation from all current leaders and org admins before adding new leaders or removing leaders, as this will affect their admin permission levels
Click Leadership Dashboard in the top right corner
Select the community
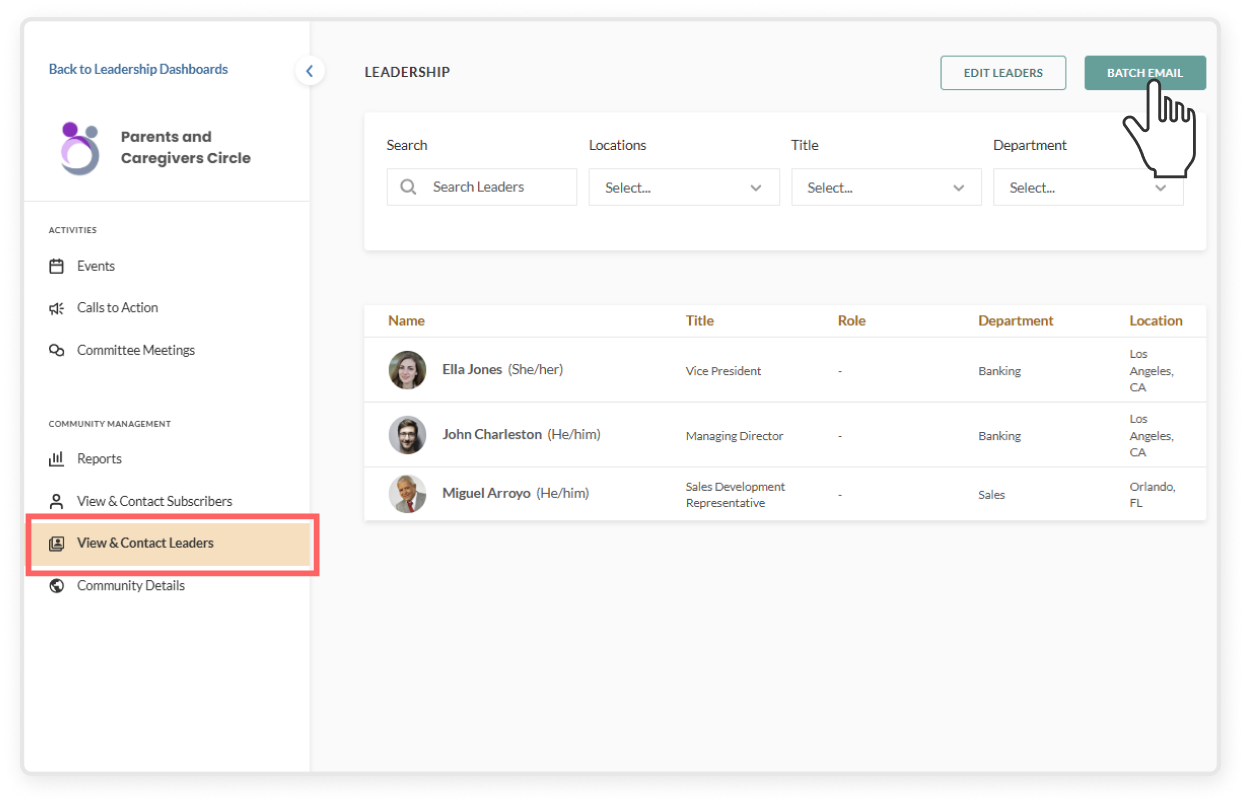
On the left sidebar, click View and contact leaders and the transparent Edit Leaders button
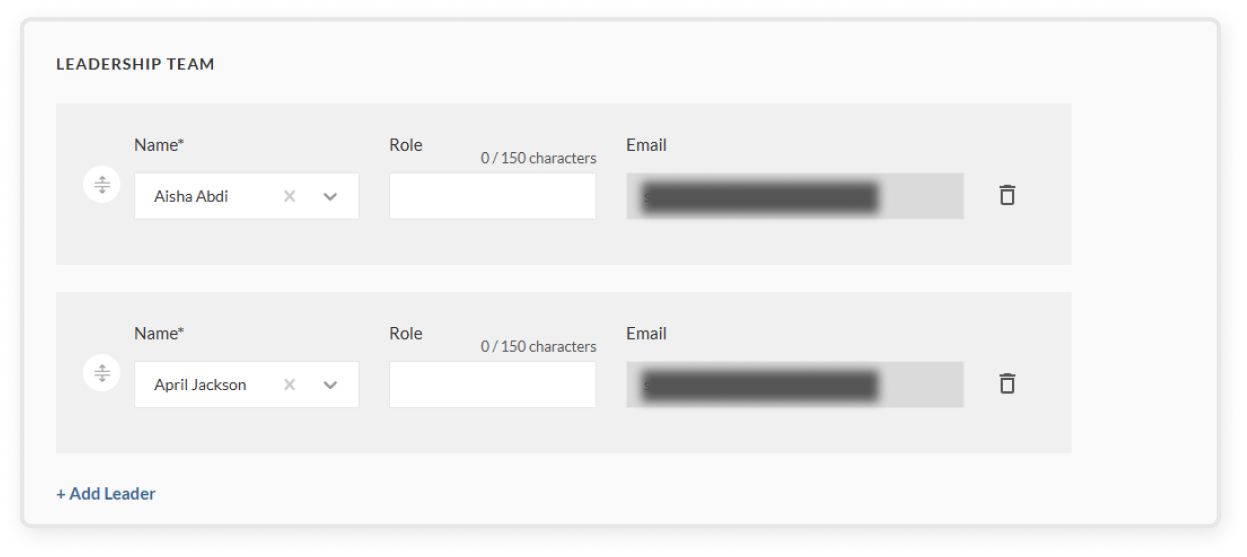
Alternatively, you can navigate to the Community Details tab and scroll down to theleadership team section
To add leaders, click Add Leaders and search for the individual’s name
Note: adding leaders will grant them admin access to all community activities, including events, calls to action, committee meetings, reports, subscriber lists, etc
To remove leaders, click the trash can icon after the leader’s email address
You can also update leadership roles and titles here
Send a batch email to leaders
Click Leadership Dashboard in the top right corner
Select the community
Click View and contact leaders on the left sidebar
Filter the subscriber list by locations, title, department, or even specific names if necessary
Click the green Batch Email button and compose your message, including a subject line, body text, and attachments as relevant
Click the green Send button to deliver the email to all leaders
View community subscriber list
Click Leadership Dashboard in the top right corner
Select the community
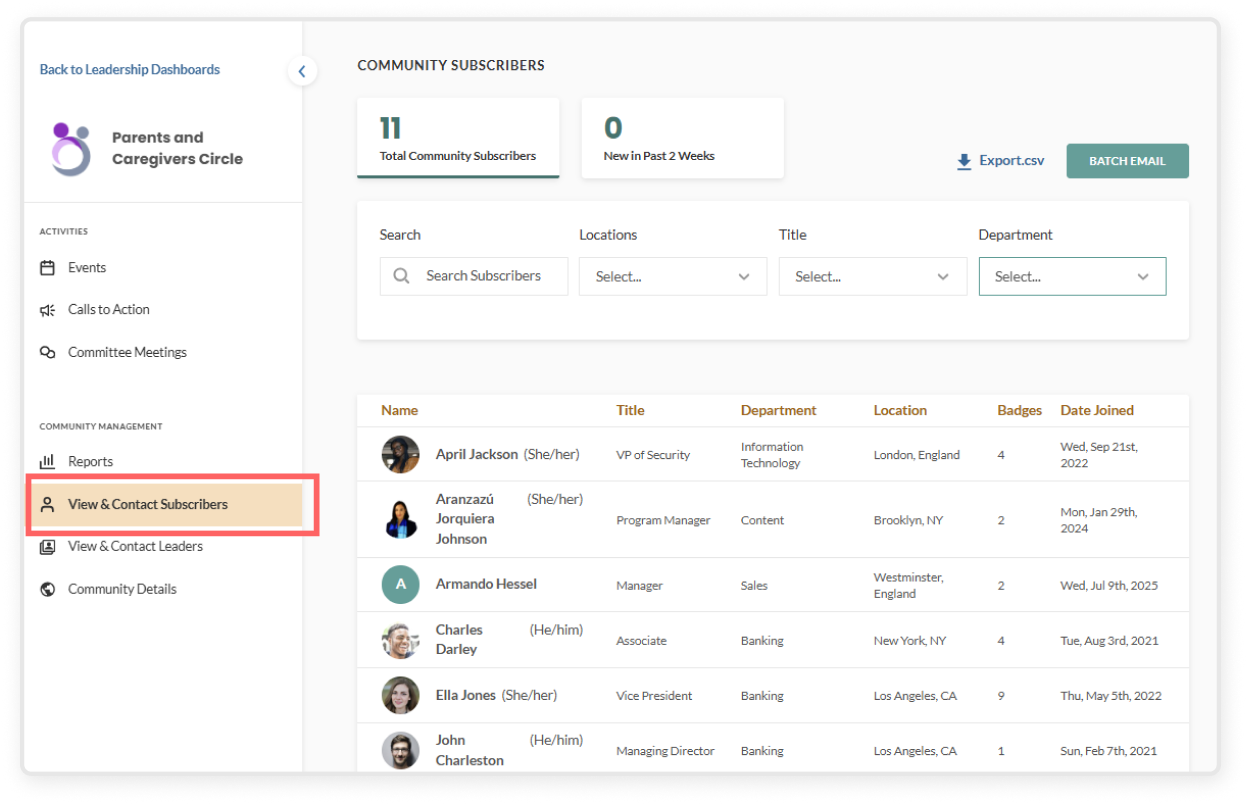
On the left sidebar, click View and contact subscribers
Filter the subscriber list by locations, title, department, or even specific names if necessary
To see the list of subscribers who have joined recently, click the tab New in Past 2 Weeks
If enabled by your organization, you may also be able to download a copy of the table by clicking Export.csv
Send a batch email to subscribers
Click Leadership Dashboard in the top right corner
Select the community
On the left sidebar, click View and contact subscribers
Filter the subscriber list by locations, title, department, or even specific names if necessary
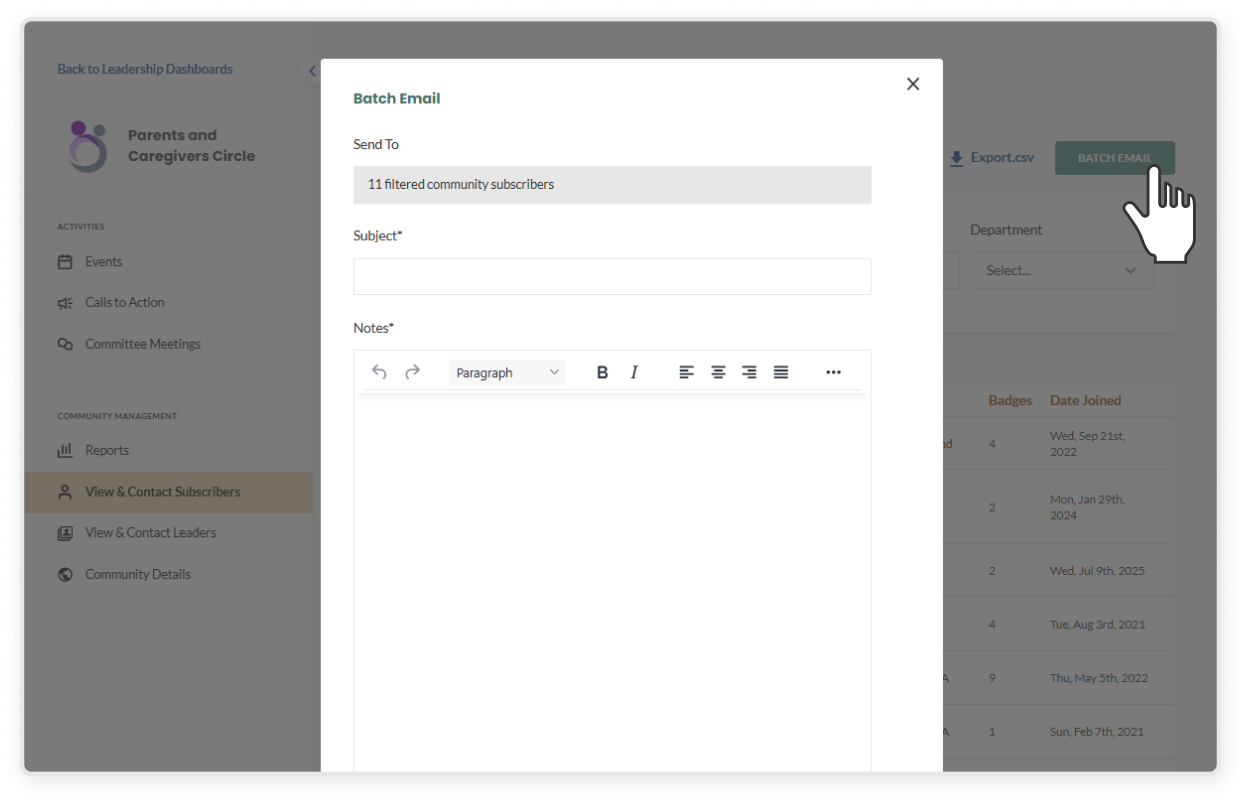
Click the green Batch Email button and compose your message, including a subject line, body text, and attachments as relevant
Click the green Send button to deliver the email to selected subscribers
Add a reply-to email address for your community
Click Leadership Dashboard in the top right corner
Select the community
On the left sidebar, under Community Management, click Community Details
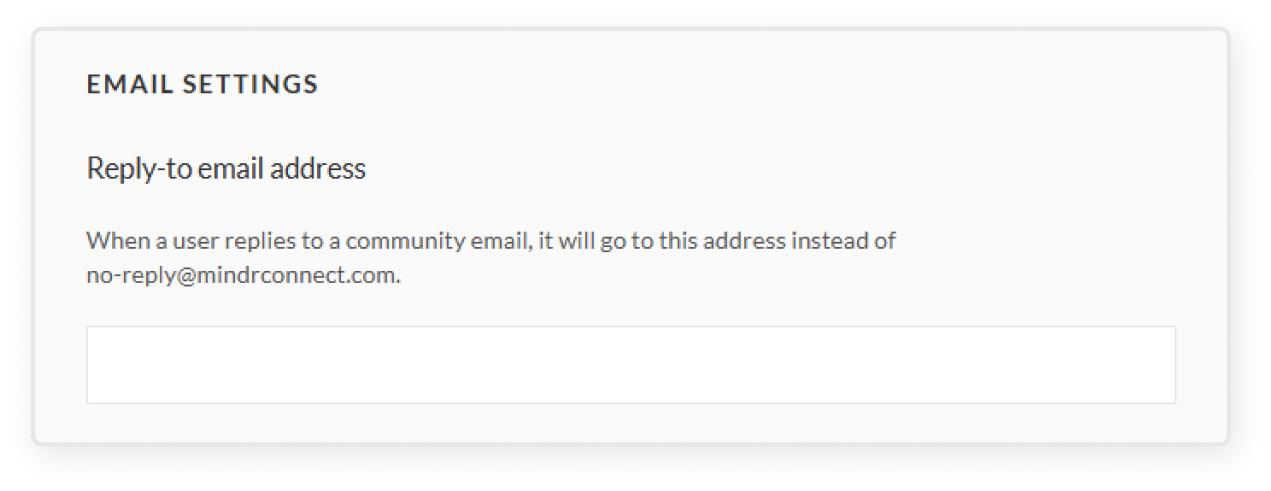
Scroll down to the section entitled Email Settings
Type in your desired reply-to email address
When a user replies to a community email, it will go to this address instead of no-reply@mindrconnect.com
How badges work for community leaders
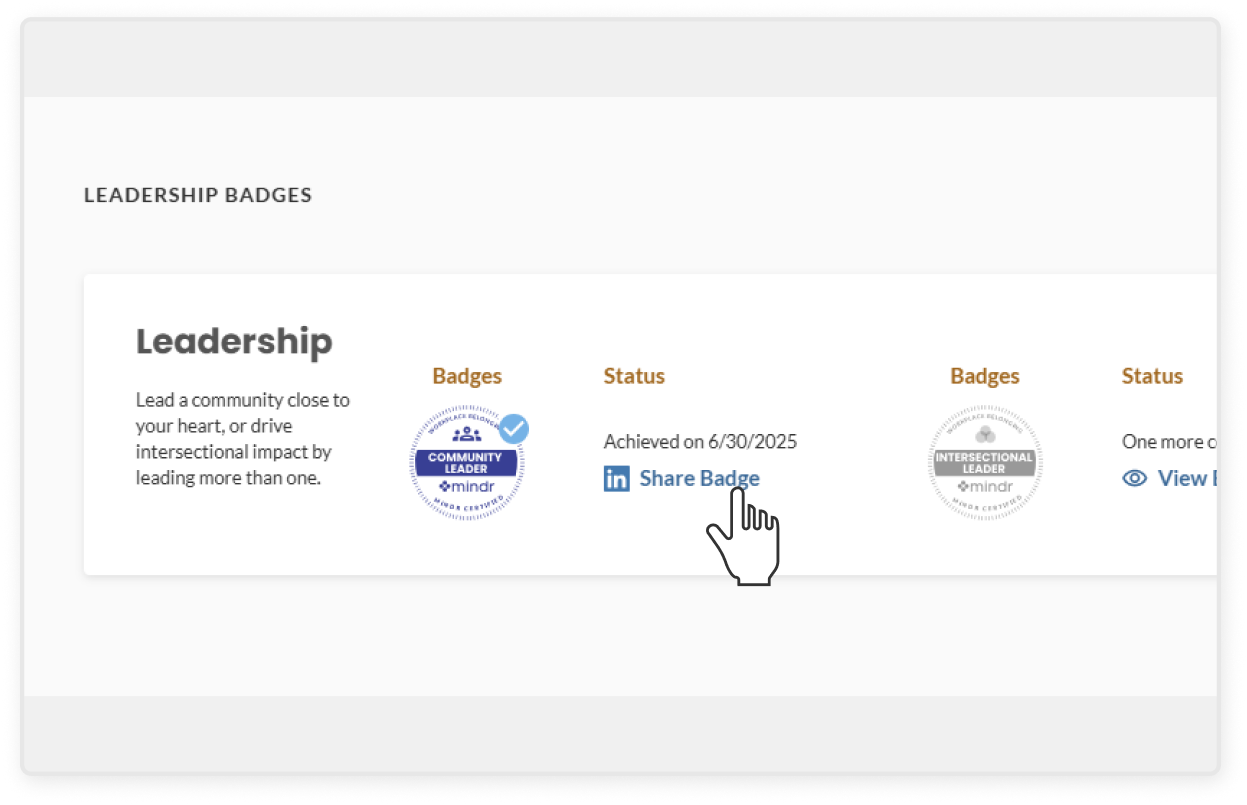
You can earn 2 badges for being a community leader
Lead a community to earn the “Community Leader” badge
Lead two or more communities to earn the “Intersectional Leader” badge
To see each individual badge in a larger view, click the relevant View Badge button
Once a badge has been earned, you can share your achievement on LinkedIn by clicking Share Badge
In the nav bar, go to Community Management and select Community Budget
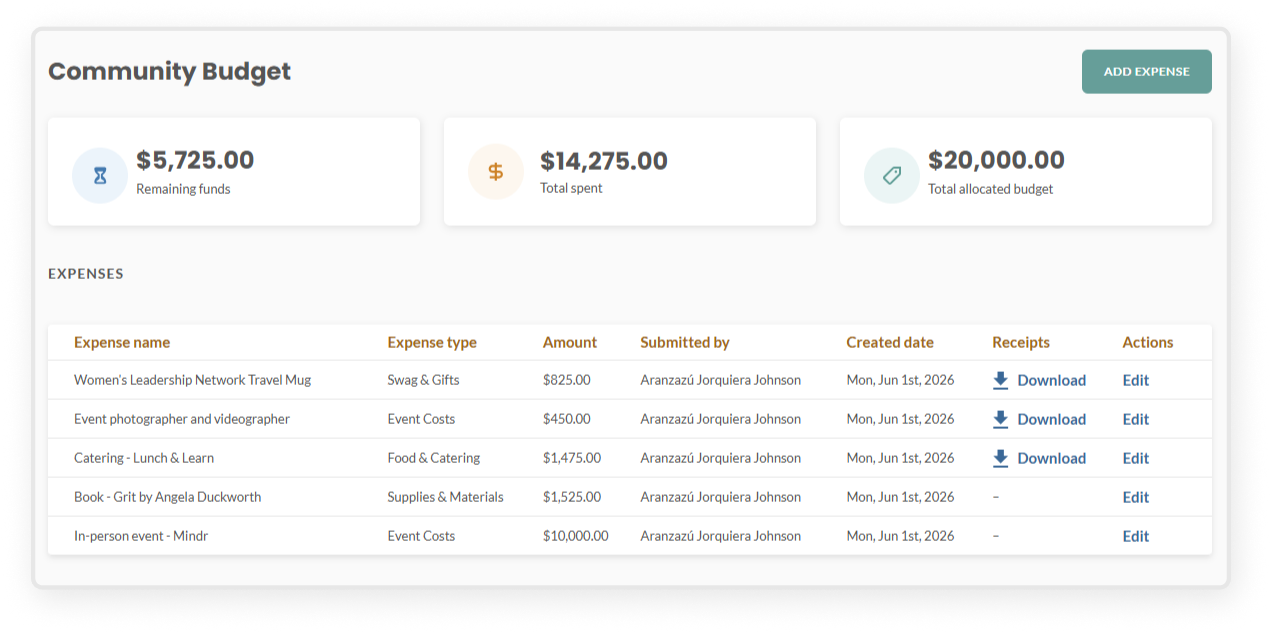
Review your remaining funds, total spent, and total allocated budget at the top
Click Add Expense
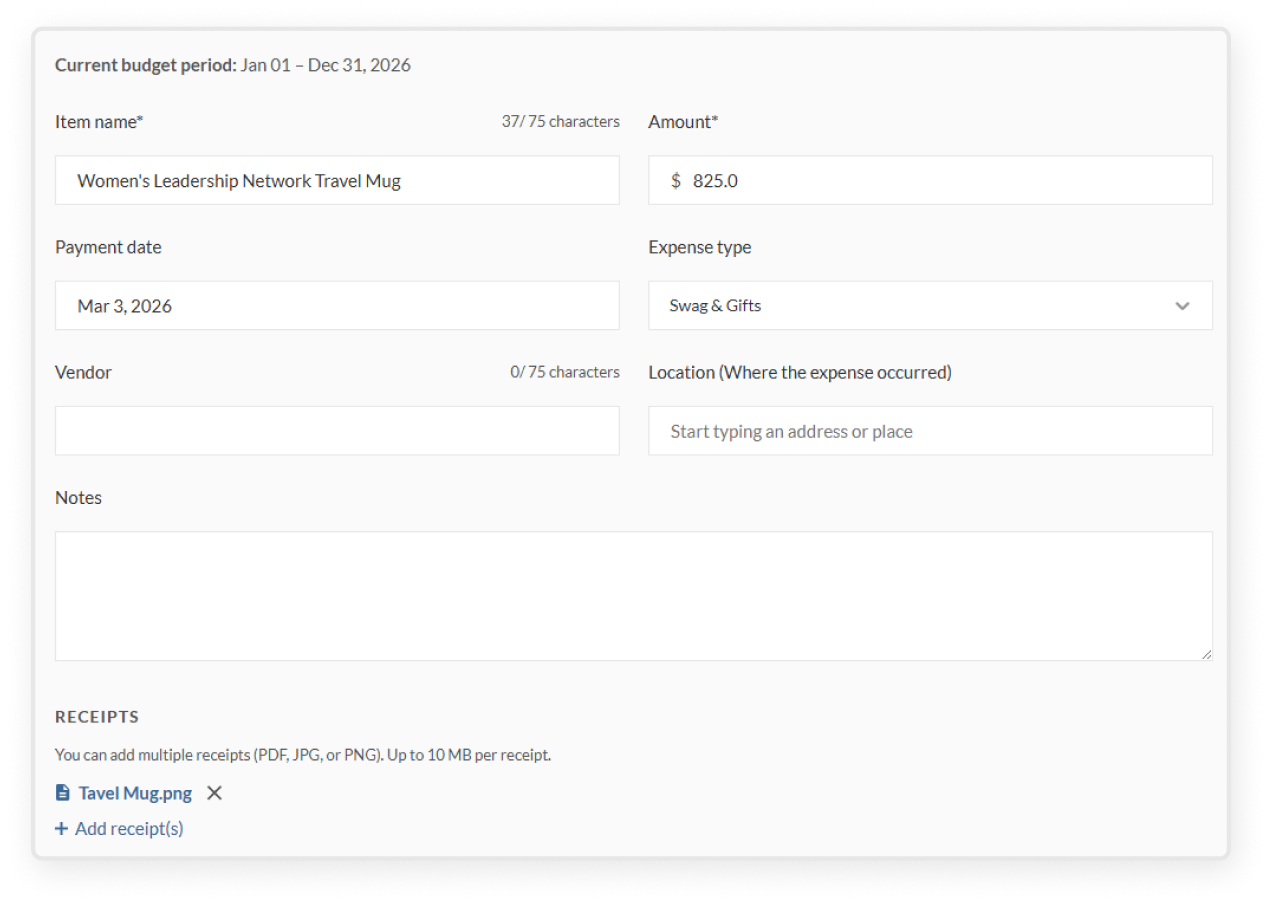
Complete the form:
Item name
Amount
Payment date
Expense type
Vendor
Location
Notes
Receipts – upload supporting files. Accepted formats: PDF, JPG, JPEG, PNG. You can upload multiple receipts and remove any before saving. Max 10 MB per file.
Click Save Expense and confirm in the modal that appears
Once saved, your Total spent and Remaining funds will update automatically
Manage budget expenses
Once an expense is saved, it will appear in the Expenses table. Each row in the table shows:
Expense name
Expense type
Amount
Submitted by
Created date
Receipts – click to download a ZIP file containing all uploaded receipts for that expense
Actions – edit or manage the expense
To download receipts, open a saved expense and click Download Receipts in the Receipts column. A ZIP file will download containing all uploaded files for that expense.
Note: you can only edit expenses you submitted. Expenses submitted by others in the table are view-only.
If total spending exceeds the allocated budget, the budget status will be marked as Over Budget and flagged in red for the org admin