View and manage users, roles, invites, and your organization's budget
View user details
In the top right corner, click your settings
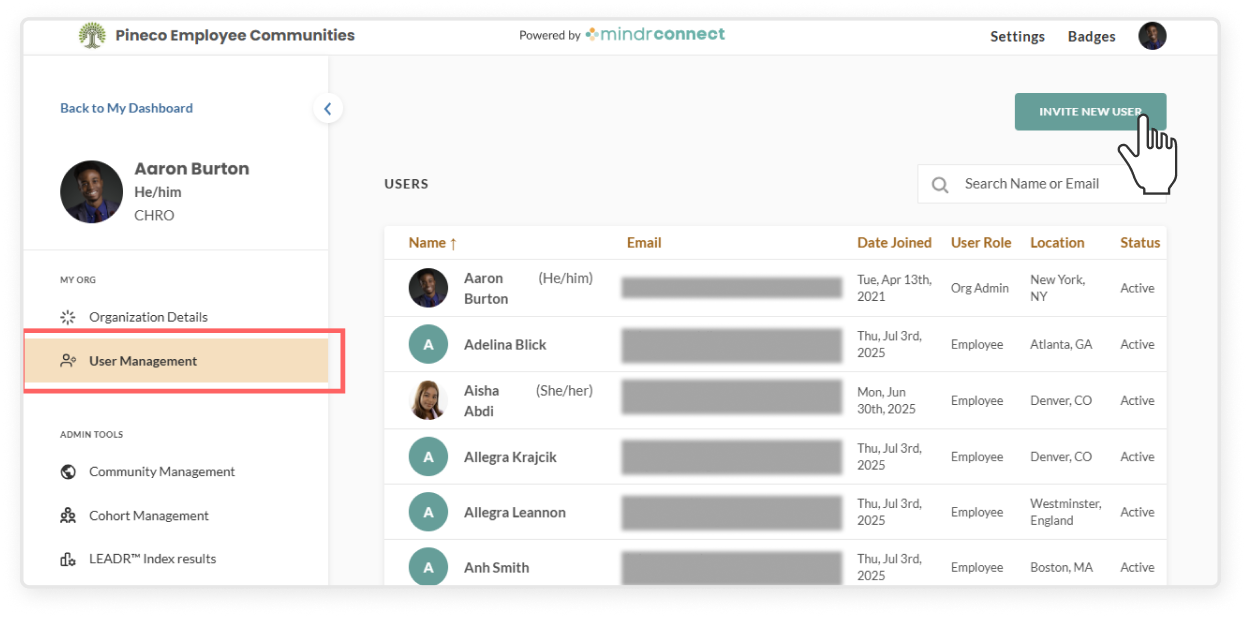
On the left sidebar, under My Org, click the User Management
From there, you can view each user’s details – including their name, email, date joined, user role, location, and status
Invited means they haven’t activated their account yet
Active means they have access to the Mindr Connect platform
Deactivated means that they have been removed from the Mindr Connect platform (most often meaning they have left the organization)
Use the search bar or click specific column names to easily find and sort through users
Invite new users
Please note that during integration, a SCIM import will be set up to automatically add and remove users. However, a manual option is still available for adding new users:
In the User Management, click the Invite New User button in the top right corner
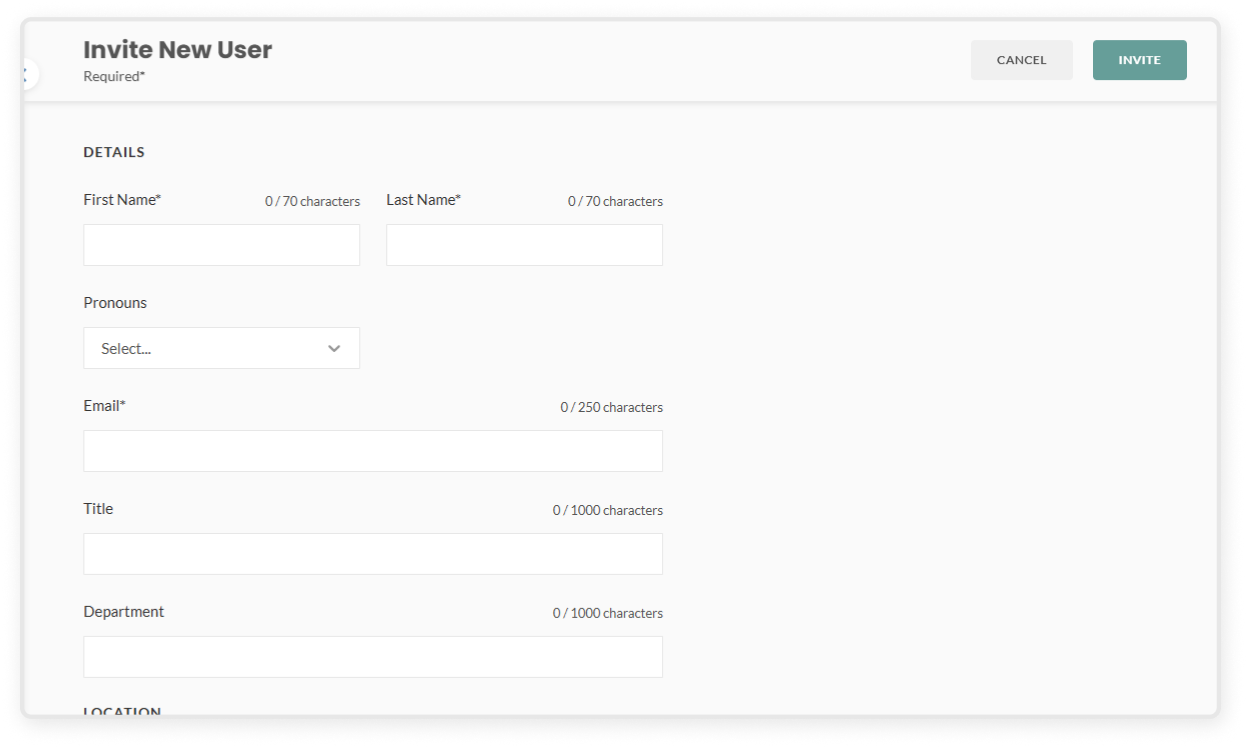
Fill out the required fields
First name and last name
Pronouns
Email
Helpful information fields include:
Title
Department
Location
Role (Employee or Organization Admin)
When you’re ready, click Invite to send the invitation. The user will need to accept it before they’re added to your organization on the platform.
Set up your org budget
In the left sidebar, go to Admin Tools and click Budget Management.
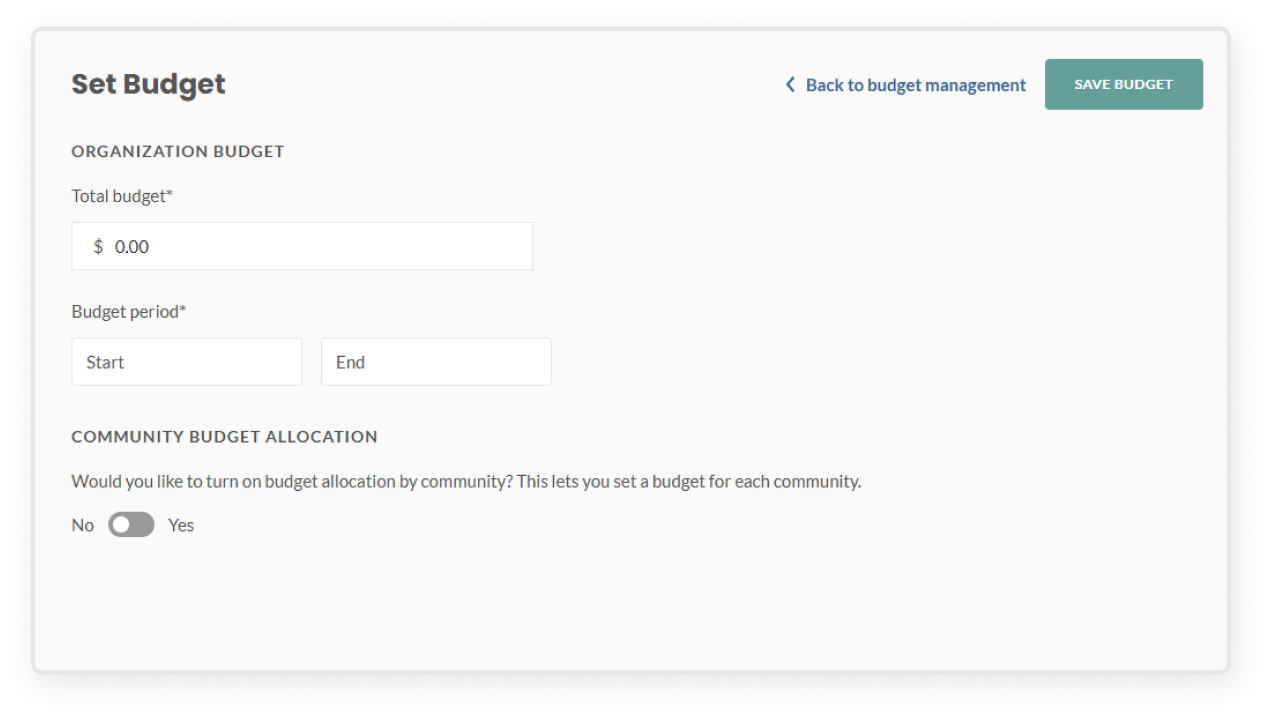
Click Set Budget
Enter the following details:
Total budget – the overall budget for your organization
Budget period – the date range for the budget. Note that only the current period can be edited. If the selected period does not include today's date, a validation message will appear
Click Save Budget
Updating your org budget
Click Edit Budget
Update the total org budget amount
Click Save – the updated amount will reflect across the dashboard
Allocating budget to communities
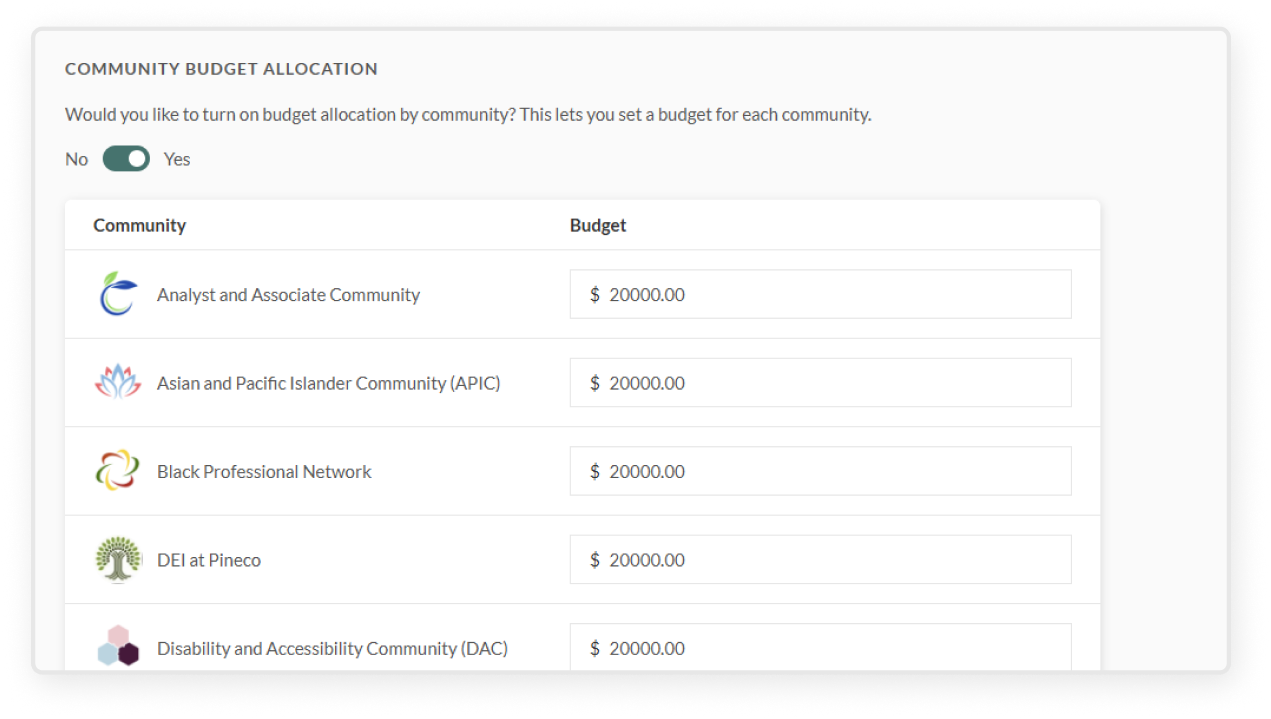
Toggle on Community budget allocation
Allocate a budget amount to each community
Click Save – allocations will appear in the community budget overview table.
To update an existing allocation:
Click into the allocation you want to edit
Update the amount and save. Changes will reflect in both the org budget and community allocations
View org budget dashboard
In the left sidebar, go to Admin Tools and click Budget Management
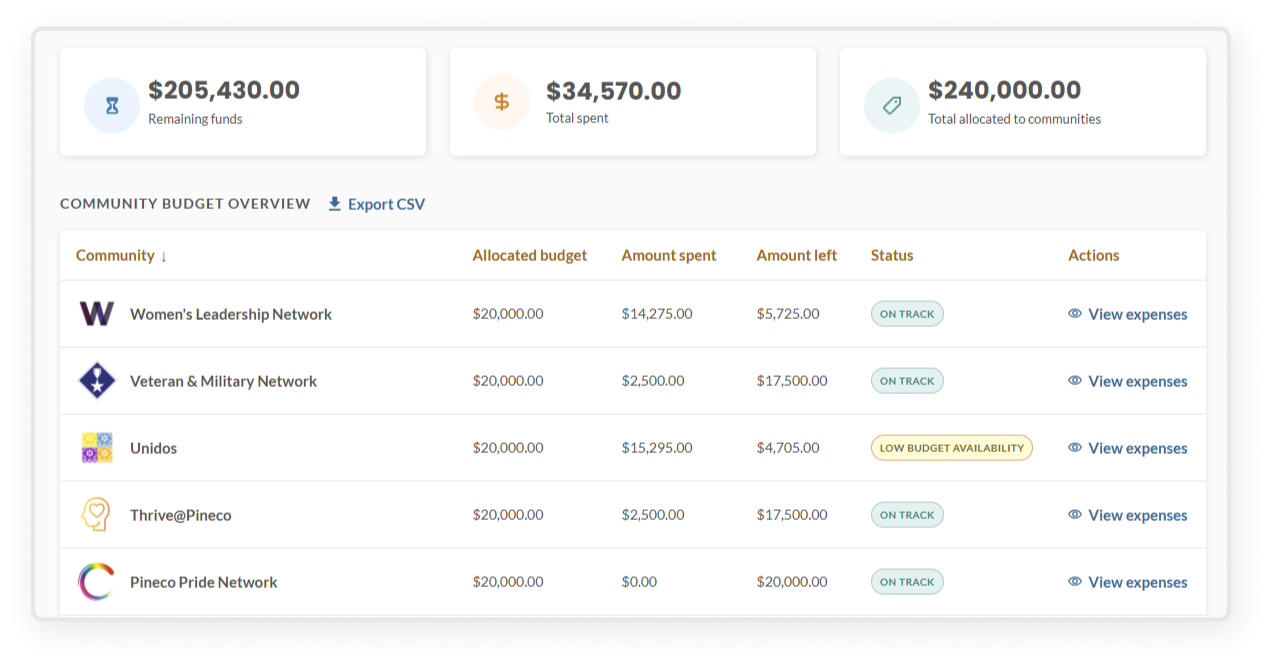
The dashboard gives org admins a high-level view of budget health:
Total budget – the total org budget set for the current period
Total spent – the total amount spent across all communities
Remaining funds – what's left after expenses
These numbers update automatically as expenses are added or budgets are changed
The overview table shows a breakdown by community, including:
Allocated budget – the amount allocated to that community.
Amount spent – total expenses logged by that community.
Amount left – remaining funds for that community.
Status:
On Track – total spent is under 75% of the allocated budget.
Low Budget Availability – total spent is between 75–99% of the allocated budget.
Over Budget – total spent has reached 100% or more of the allocated budget.
Click View expenses in the Actions column to open the community budget dashboard for that community