Create, publish, and manage events, including sending invites and handling waitlists
Create an event in your community
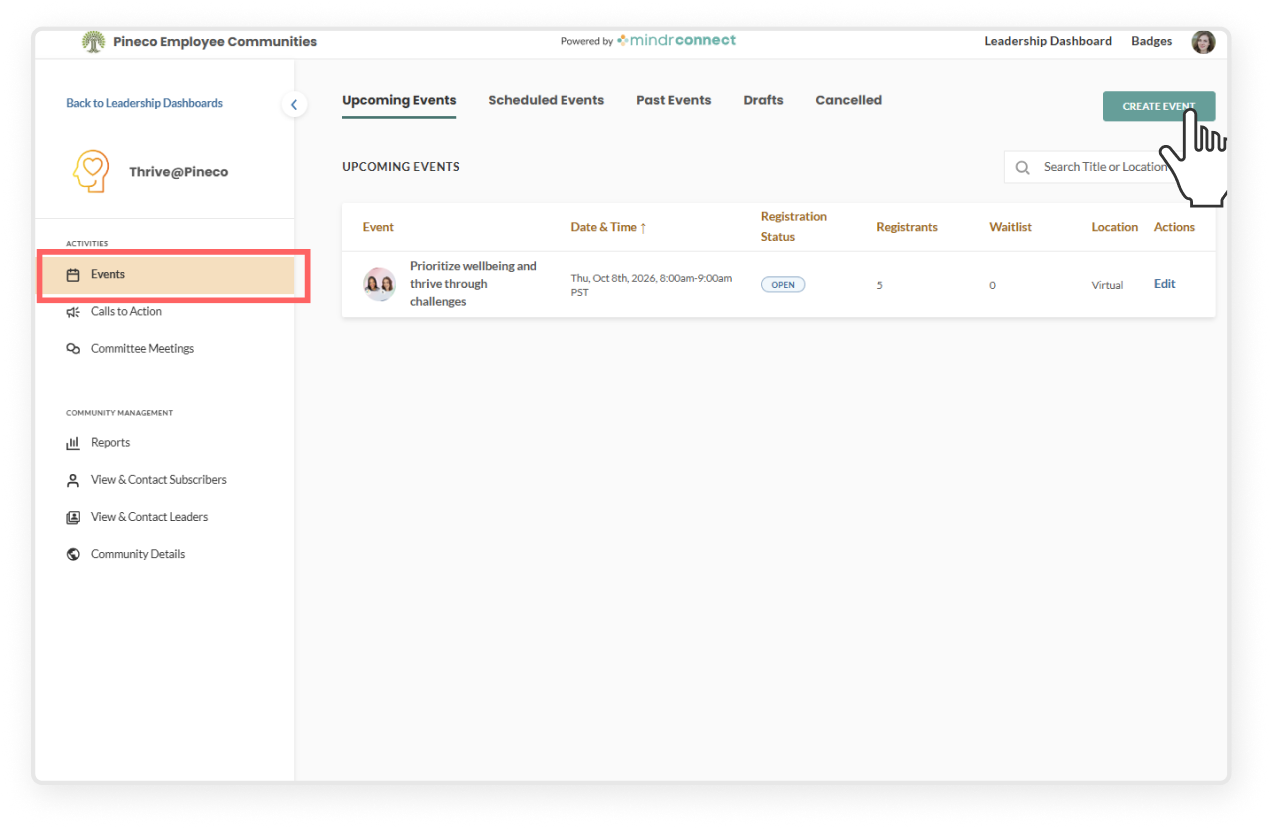
Click Leadership Dashboard in the top right corner
Select the community and click Events on the left sidebar
Click the green Create Event button
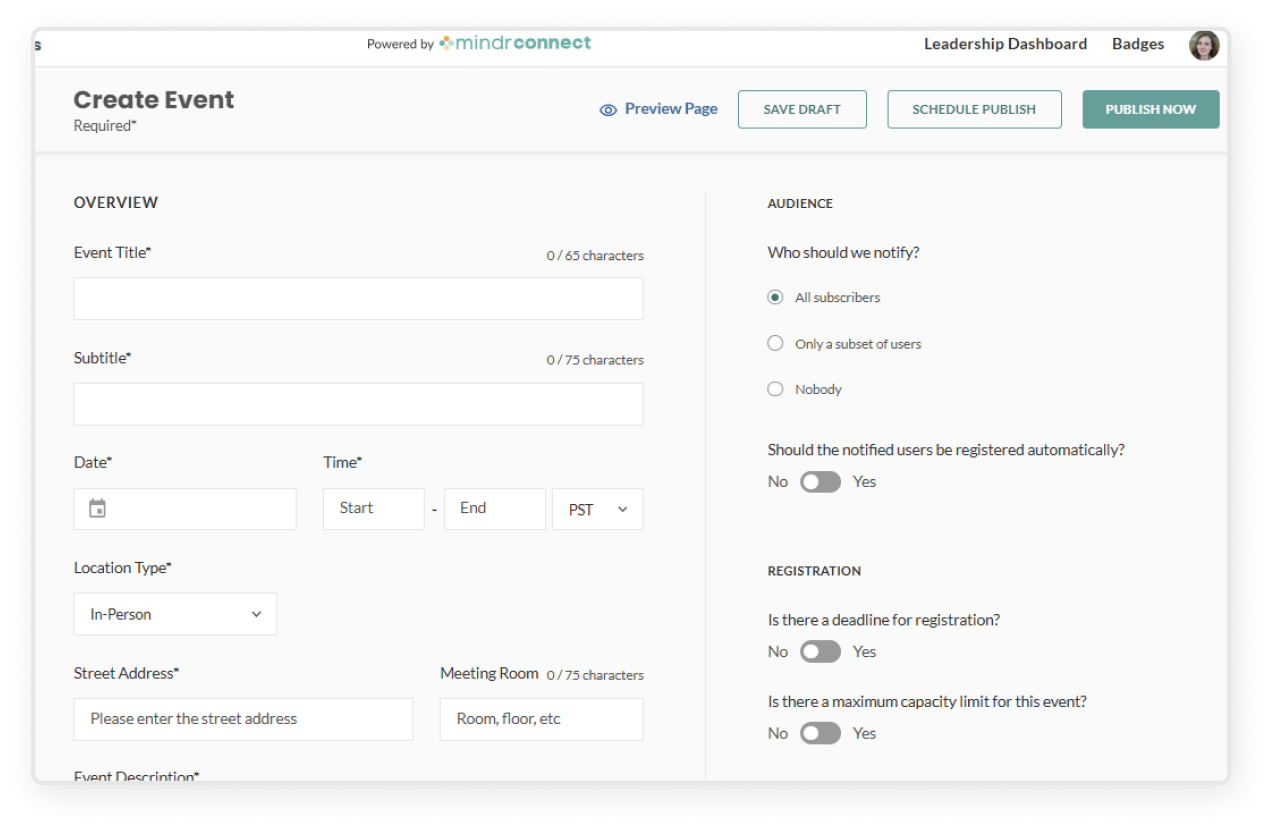
Complete the required fields
Title (name of event)
Subtitle (engaging sub-heading)
Date/Time
Location (dial-in link or physical address)
Event description
This will be the body of the email and main text of the event page, and should include all relevant information and details about the event. You have full rich text editing capabilities, such as creating headings, bolding, italicizing, underlining, adding bulletpoint lists, hyperlinks, etc.
Upload an image (optional: Add image caption)
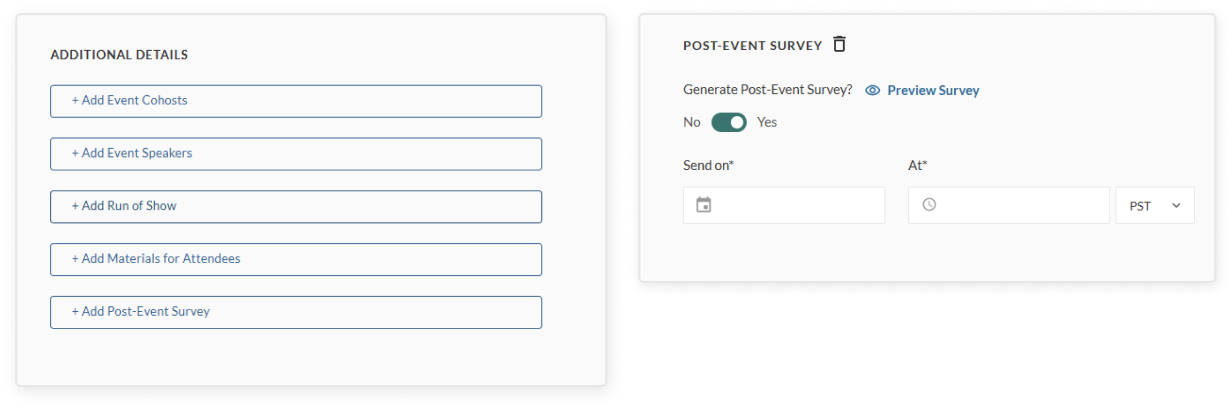
Scroll down to the Additional Details section. These fields are optional, but they help make your event more engaging and informative.
+ Add event cohosts: You can add co-hosts, which will give that community’s leadership team complete edit access to the event, and send an invitation to that group’s subscriber base. Be sure to get permission from the relevant leadership teams before adding cohosts.
+ Add event speakers: Add name, title, organization, bio, and a photo for each speaker. If you add a speaker, you must upload a photo to successfully save the event.
+ Add run of show: Use this section to build the run of show for your event. If you check “Show on Invitation,” the item will be added to the public agenda for the event. Leave this box unchecked for items such as sound check that should only be visible to event organizers.
+ Add materials for attendees: Use this section to add documents or links you want attendees to check out. You can drag and drop to reorder the materials using the icon at the front.
+ Add post-event survey(Highly recommended): Enable this to automatically send a short feedback survey to all registrants after the event. We highly recommend enabling the post-event survey to collect feedback from registrants, which will be visible in the “Reports” tab.
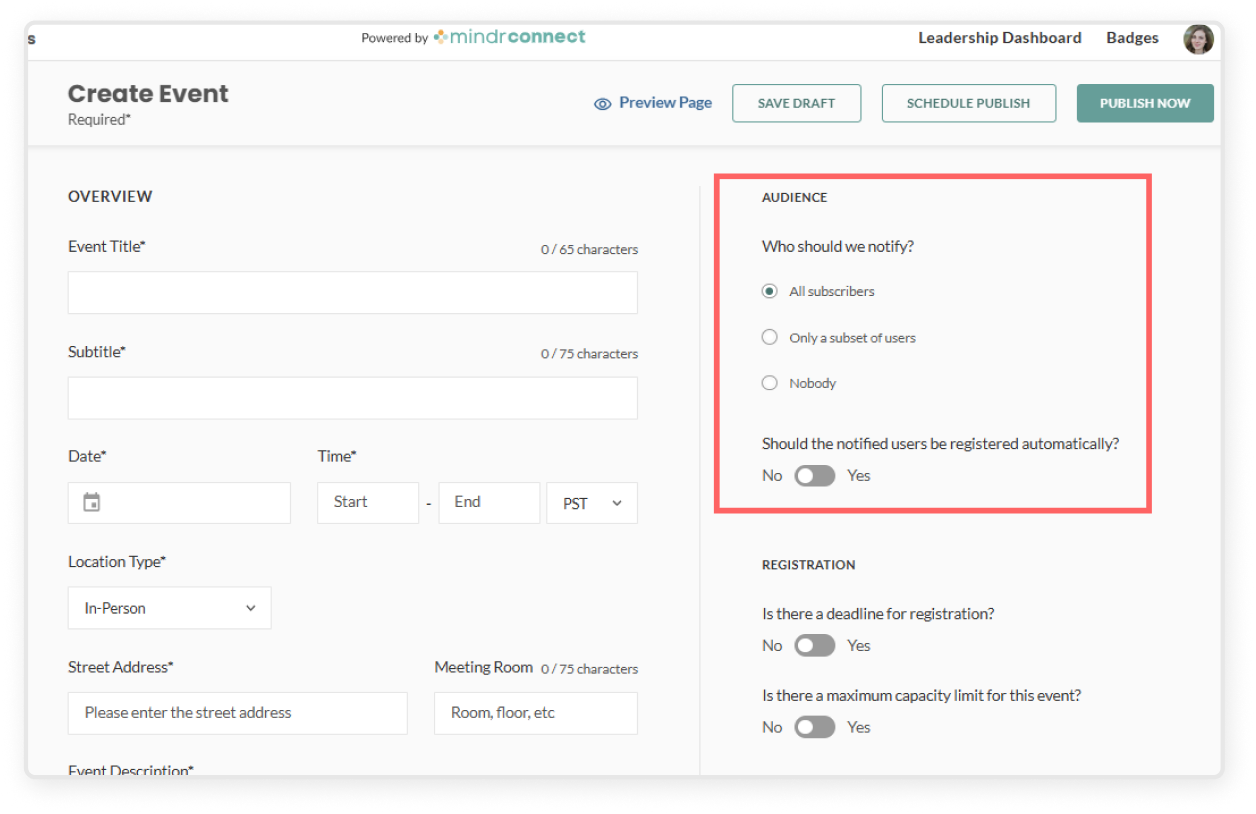
Use the Audiences section to notify your event audience
Click the green Create Event button (or open an exisitng event in Drafts)
In the event creation page, go to the Audience section in the right sidebar
Select the audience you would like to notify about the event
All subscribers sends an email invitation to all subscribers of your community upon publishing
Only a subset of users allows you to filter by location, title, department, name, or import a CSV of specific emails to receive notifications. (Learn how it works in the section below: “Invite a subset of users to an event”)
Nobody publishes the event to the Mindr Connect dashboard, but does not send any email notifications
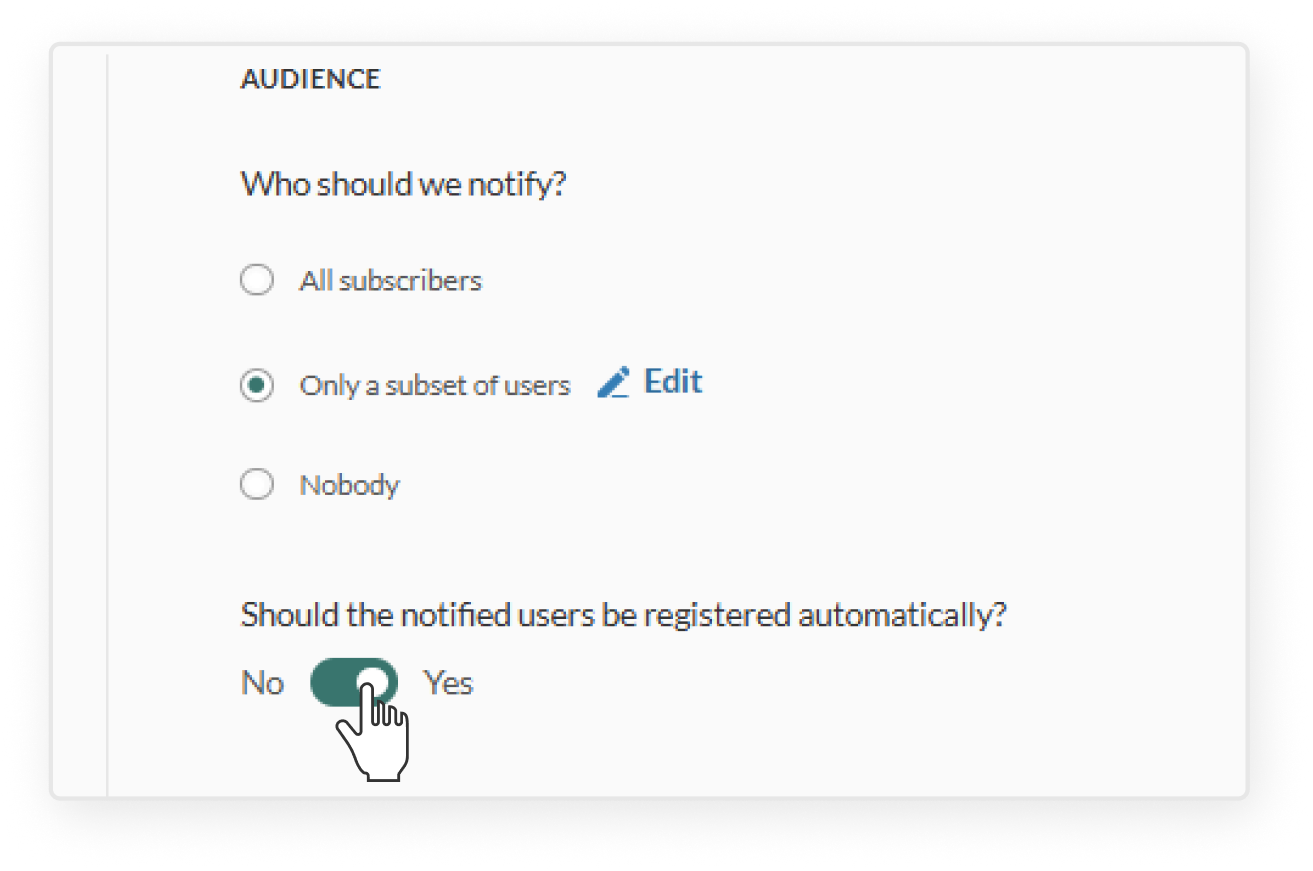
If you would like to automatically register the selected audience, toggle on “Should the notified users be registered automatically?” (Learn how it works in the section below: “Register a subset of users to an event”)
Invite a subset of users to an event
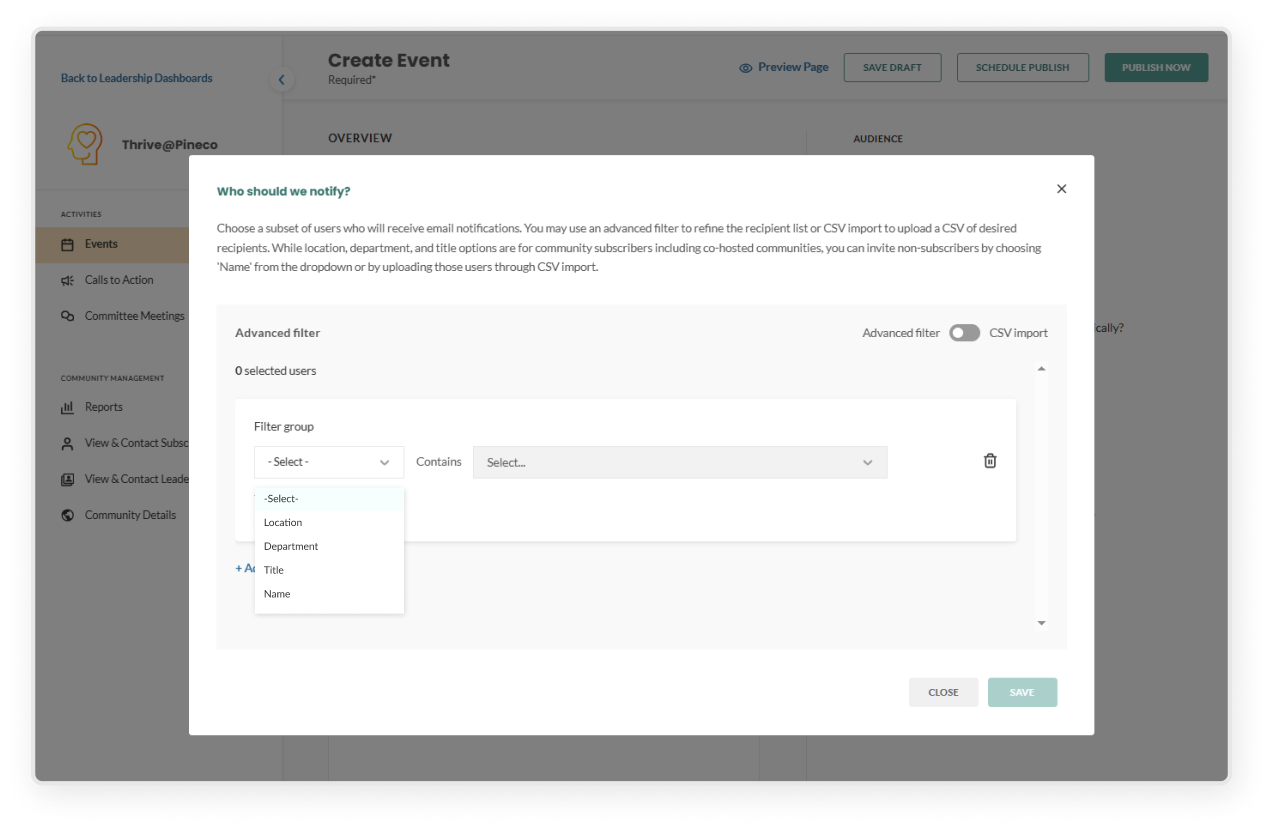
In the event creation page, go to the Audience section in the right sidebar, select Only a subset of users
Use advanced filters
Select a filter group (e.g. location, title, department, or name)
In the contains field, enter specific values. You can multi-select items in this field
Click Add filter item to include more options in the same group – for example, if you want users who are in both Location: New York and Department: Engineering
Click Add filter group to create a separate set of filters – for example, if you want to invite users who are either in Location: New York or in Department: Engineering
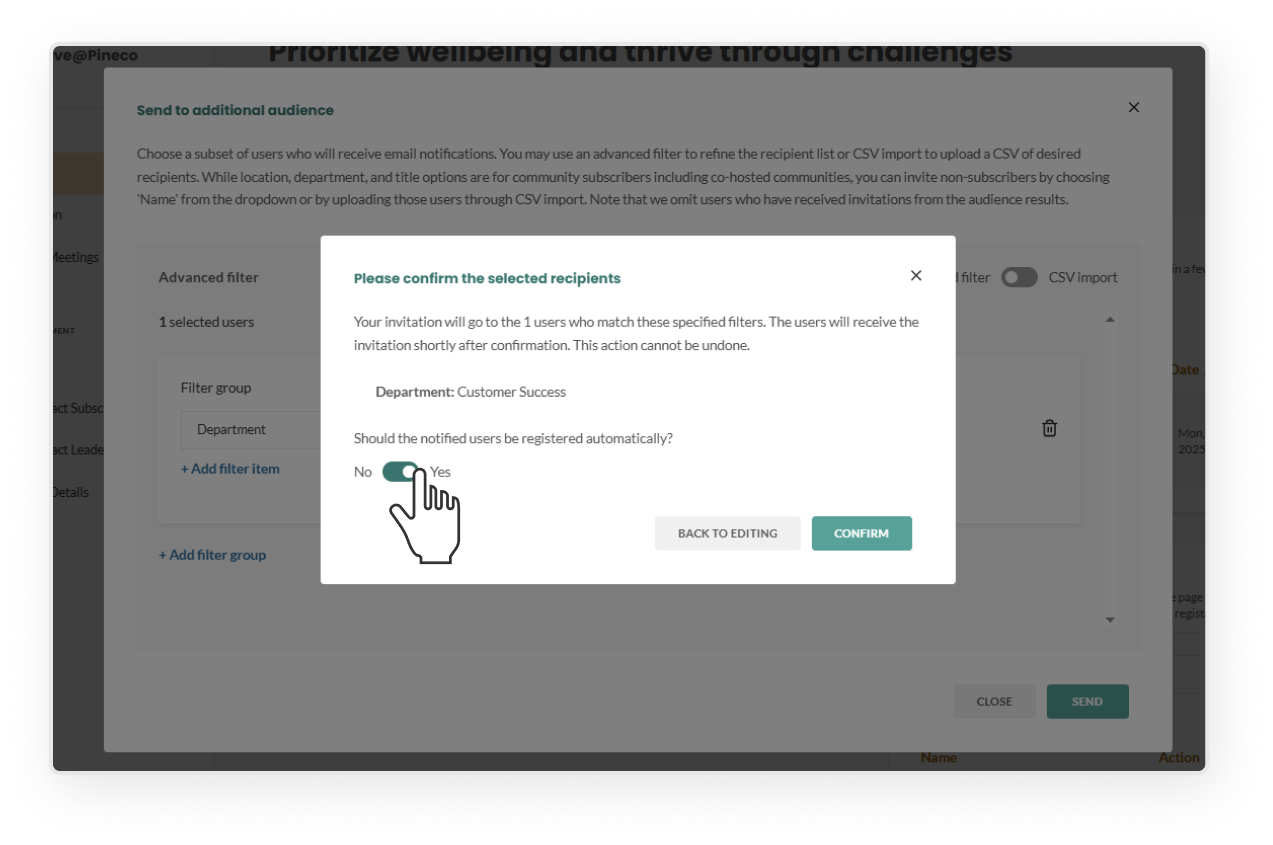
Click Save to review the list of users who will be invited, then click Confirm
To make changes before publishing, click Edit next to Only a subset of users
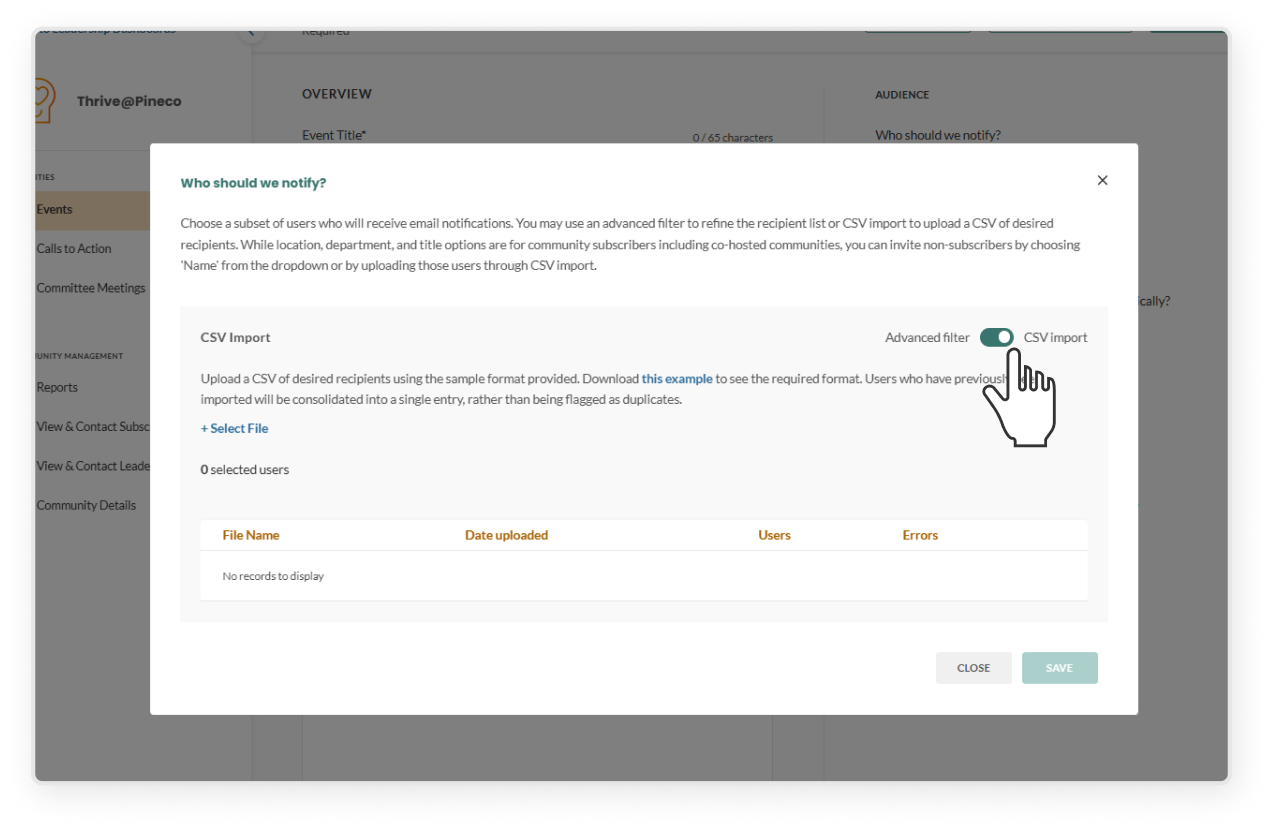
Import recipients via CSV
Toggle the CSV import
Download the sample template and follow the required format
Upload your file
Review to cross-reference how many users were successfully added and if there were any errors
Click the error link to download and view reasons for failed uploads
To remove the file, click the "X" next to the uploaded file and confirm in the modal
Upload a corrected file and click Save
On the confirmation modal, click Confirm – this will replace any filters you set using Advanced Filters
After publishing:
Selected users will receive the invitation immediately
Click theevent to open the event overview page
In the Communication Log on the right, click the specific log entry to see who was invited
🔔 NOTE: You won’t be able to edit this audience after publishing
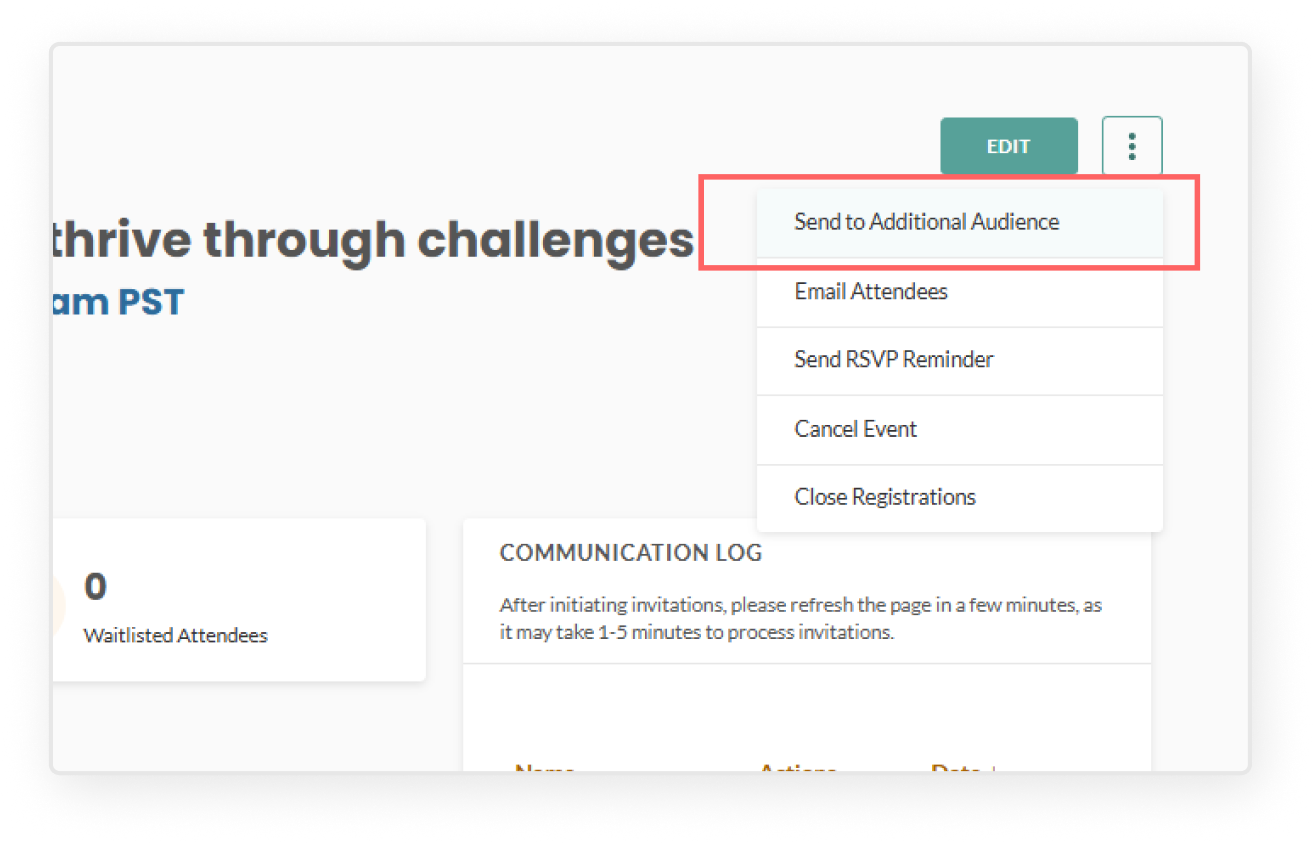
To invite a different subset of users, click the three-dot kebab menu and select Send to Additional Audience.
Subscribers who have already been invited will not receive another invitation
If everyone in the audience has already been invited, the Selected Users count will display 0
You can follow the same steps using Advanced Filters or CSV Import to invite additional audiences
If a user has already been invited, you can nudge them instead by using the Send Reminder option
Register a subset of users to an event
In the Audience section, after selecting your audience, you can choose to automatically register the selected users instead of sending them an invitation.
Toggle “Should the notified users be registered automatically?” under the Audience section
Once the event is published, users will be automatically registered. Their event will appear as “Registered”in their dashboard and the event will be added to their calendar
After publishing:
Selected users will be automatically registered
Go to the event overview page by clicking the event row
In the Activity Log on the right, click the specific log entry to see who was registered
🔔 Note: You won’t be able to edit this audience once the event is published. However, if you need to register another subset of users, you can go to the three dot kebab menu and select Send to Additional Audience, then toggle on auto-register from the confirmation page.
Enable event waitlist
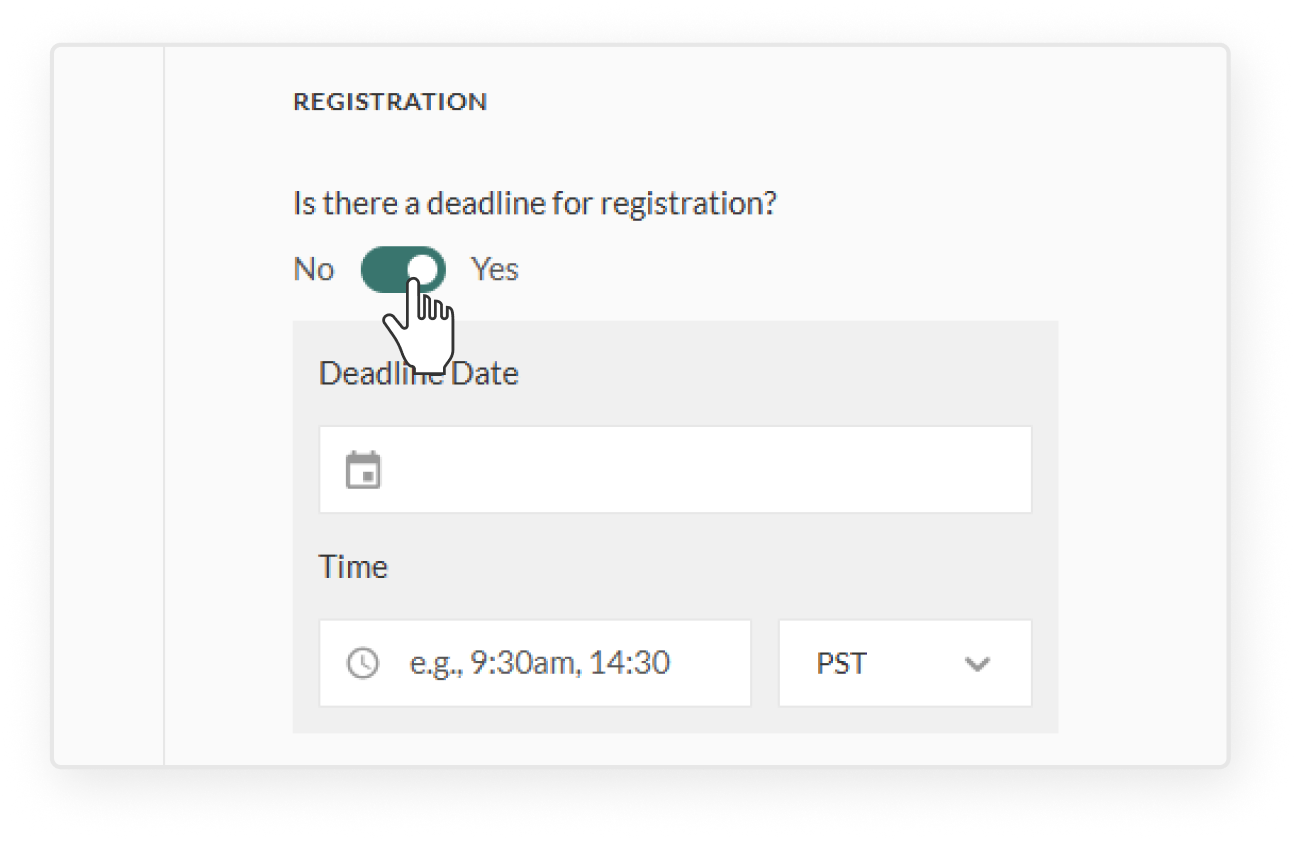
On the right side panel, go to Registration section
Set an event deadline
Event registration automatically closes at a designated date and time, automatically triggering the waitlist to open
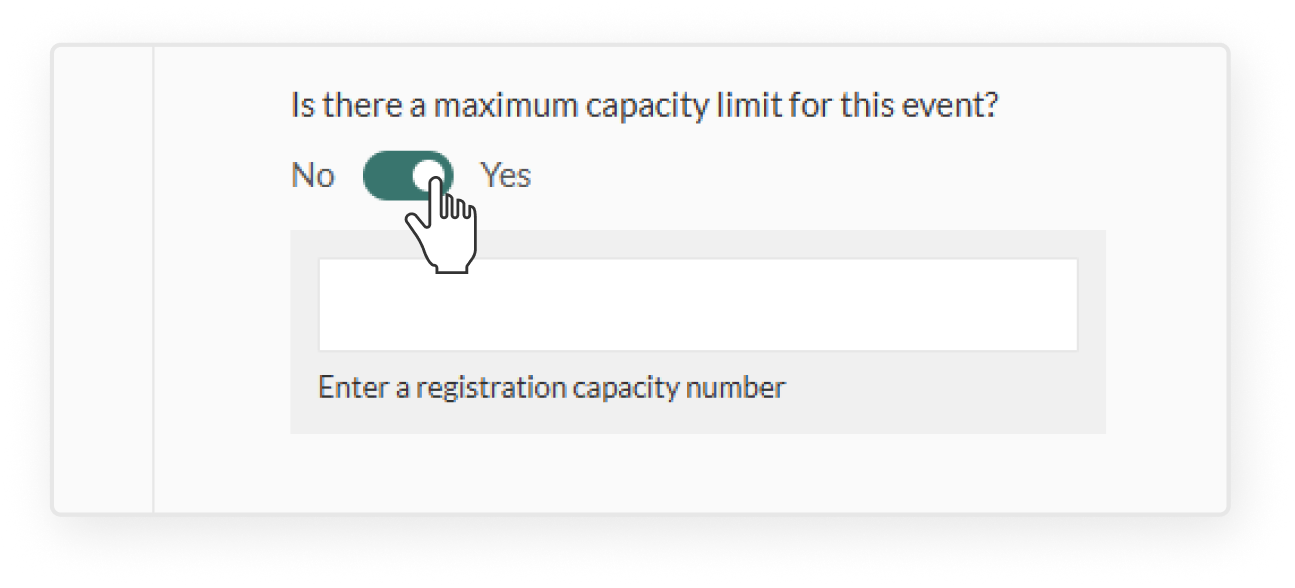
Set a maximum capacity
Event registration automatically closes when attendance reaches the capacity limit, automatically triggering the waitlist to open
🔔 NOTE: If an event has reached its maximum capacity and a waitlist is active, increasing the capacity on the event update page will send an email notification to waitlisted users letting them know that more spots are available. Waitlisted users must register manually to secure a spot; they will not be automatically moved off the waitlist.
Save or publish an event
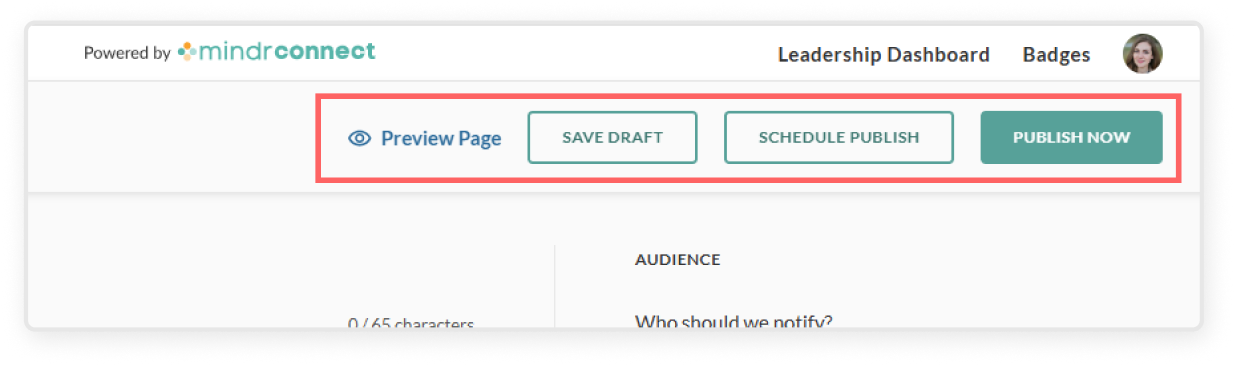
Click Preview Page to see how your page will look when published
Make sure you have added all required fields before publishing
Once you're happy with it, save or publish:
Save as Draft will save your work to the "drafts" tab, which other leaders of the community can access and collaborate on
Schedule Publish allows you to set a specific time and date for the content to be published
Publish Now publishes the content immediately, and sends email notifications to the selected audience
Edit draft event
Click Leadership Dashboard in the top right corner
Select your community
On the left sidebar, click Events
In the top menu bar, click the Drafts tab
Select the specific event, which will open edit view
Important: be aware that once you hit "Publish," all subscribers of your community will receive an email notification inviting them to the event. Be sure to review thoroughly to ensure that your event draft is complete before publishing.
Click the green Publish button, read the prompt reminding you that a notification will be sent, click the second Publish button
Return to the Active Events tab to view the live event and track registrations, pre-submitted questions, communication logs, etc.
Edit scheduled event
Click Leadership Dashboard in the top right corner
Select your community
On the left sidebar, click Events
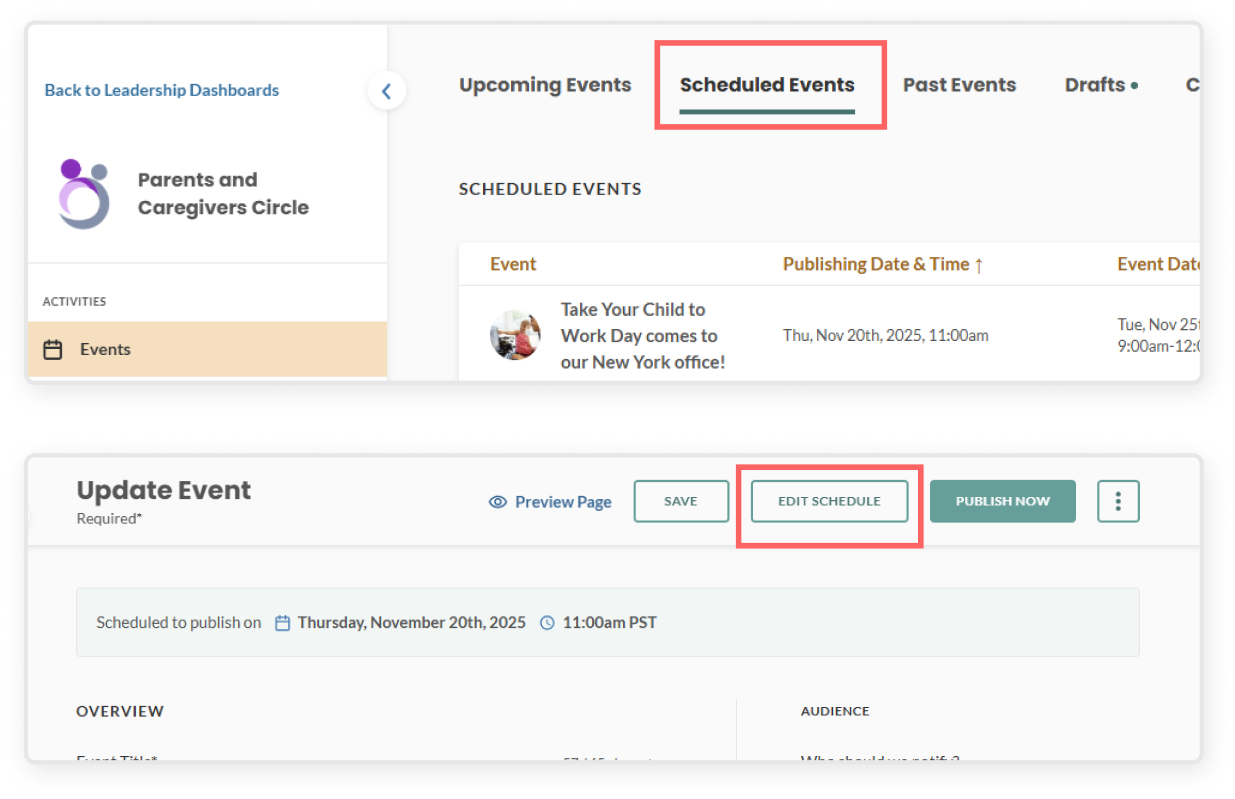
At the top, go to the Scheduled Events tab
Select theevent you want to edit
Click Edit Schedule in the blue banner
In the schedule editing modal, you can:
Update the date or time it is scheduled to publish
Remove the scheduled publish
You can also click Publish Now if you want it published immediately
Click Save to confirm your changes
Email event attendees and invite users
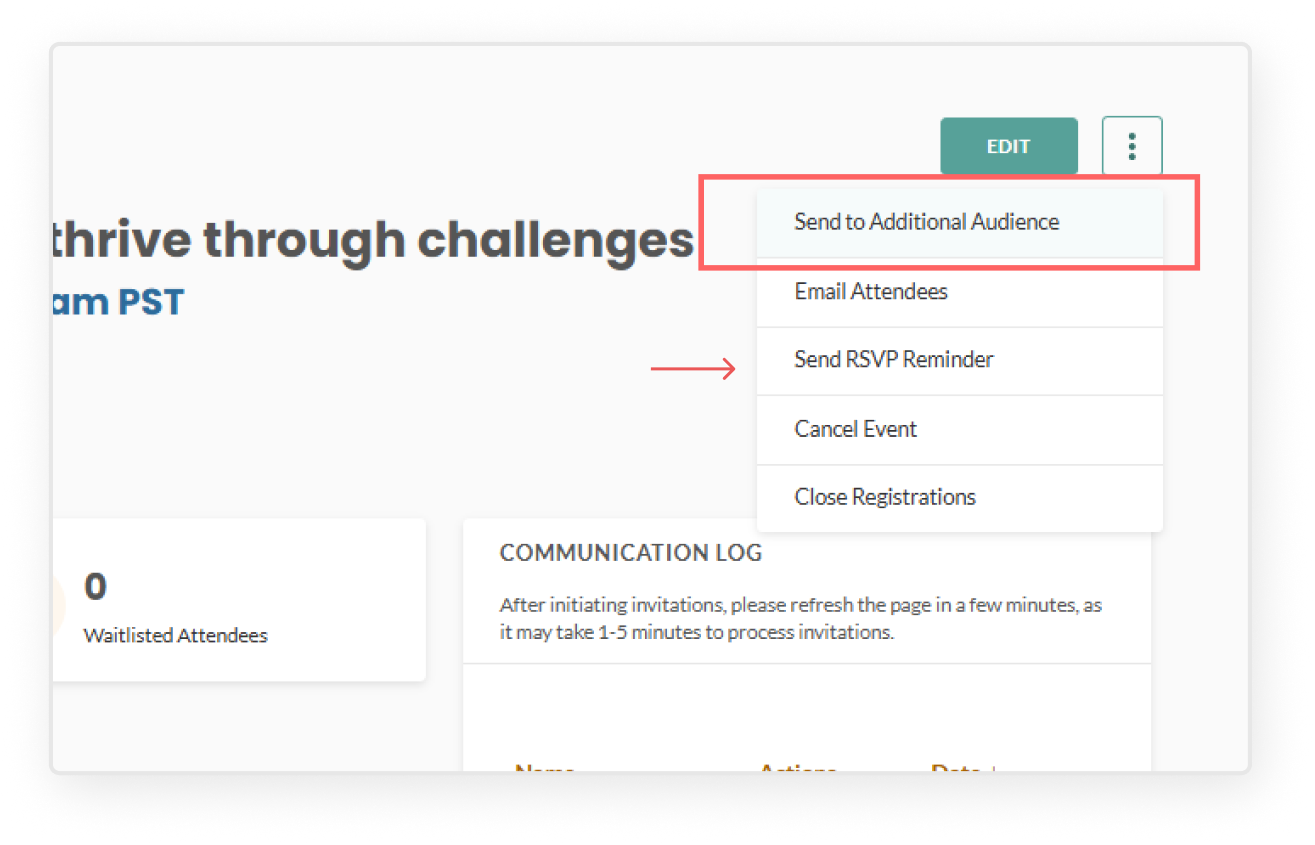
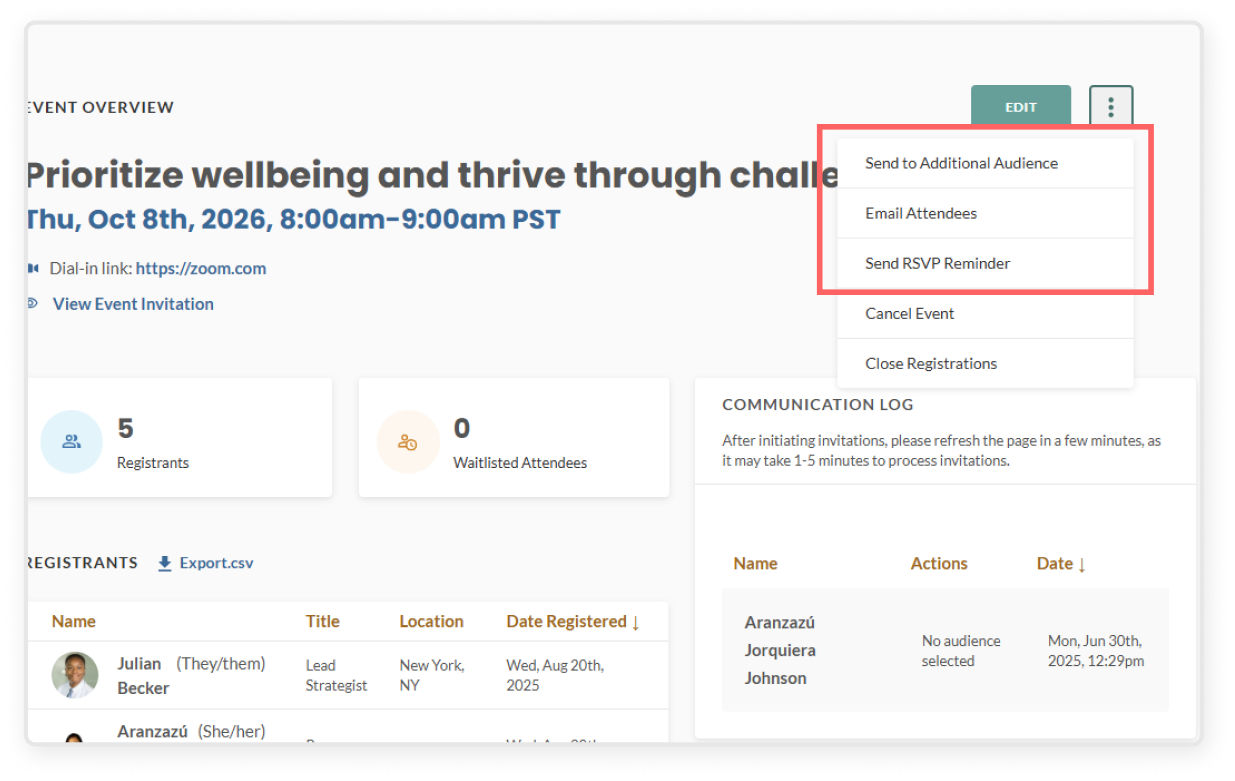
Click into the event. From the event overview page, select the three-dot kebab menu in the top-right corner to open the menu:
Send to Additional Audience – Target specific locations, job titles, or departments to invite additional users to your event.
Email attendees – Compose and send a custom follow-up email to everyone who has already registered. This can be helpful to ask registrants of an event with a waitlist to cancel their registration if they can no longer attend, so spots open up for those hoping to attend.
Send RSVP reminder – Send a reminder invitation to all subscribers who have not yet registered for the event.
🔔 NOTE: If you're added as a leader to a new community that already has live events with the audience set to All subscribers as the audience, you'll be automatically registered for those events. This means you'll immediately receive confirmation emails for each of them.
Manage published event
To edit an event, you can either:
Click the Edit button directly from the event table
Or click into the event to open the event overview page, then select the green Edit button in the top-right corner
Important: After editing key details such as location, time, or date, clicking Save will notify all attendees by email with the updated event details.
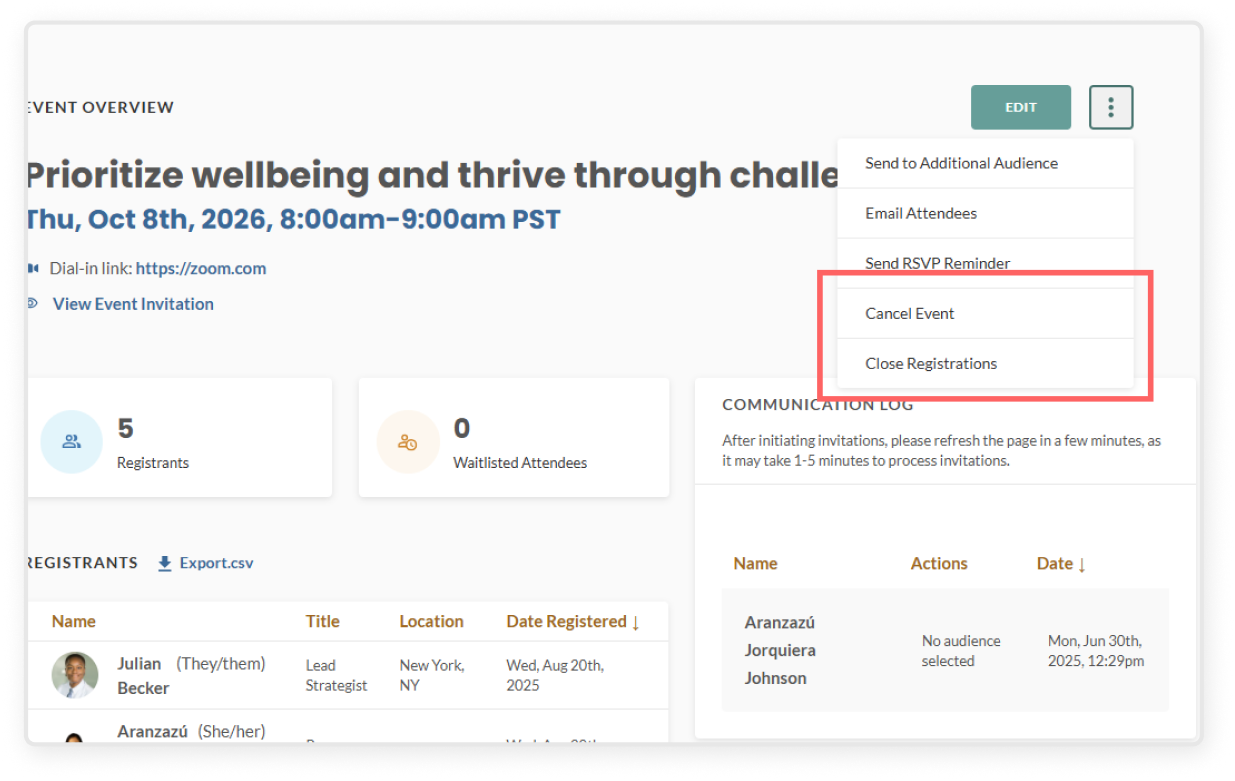
To cancel the event or update registration status:
Select theevent you want to manage
From the event overview page, select the three-dot kebab menu in the top right corner to open the menu
Cancel Event – This will cancel the event entirely, remove it from users’ dashboards and calendars, and send an email notification to all invited subscribers
Close Registration – This prevents further registrations, but still allows users to join the waitlist. A note will appear in the Activity Log section of the event overview page: “Name: [Name], Action: Closed”
Re-open Registration – Re-opens signups if registration was previously closed due to a deadline, capacity limit, or manually by a leader. This can be found in the three-dot kebab menu as it replaces the “Close Registration”